guides
Home Office Ergonomics Setup Guide (Measurements + Mistakes to Avoid)
Step-by-step guide to setting up an ergonomic home office: chair height, monitor position, keyboard angle, common mistakes. Cornell ergonomics references.
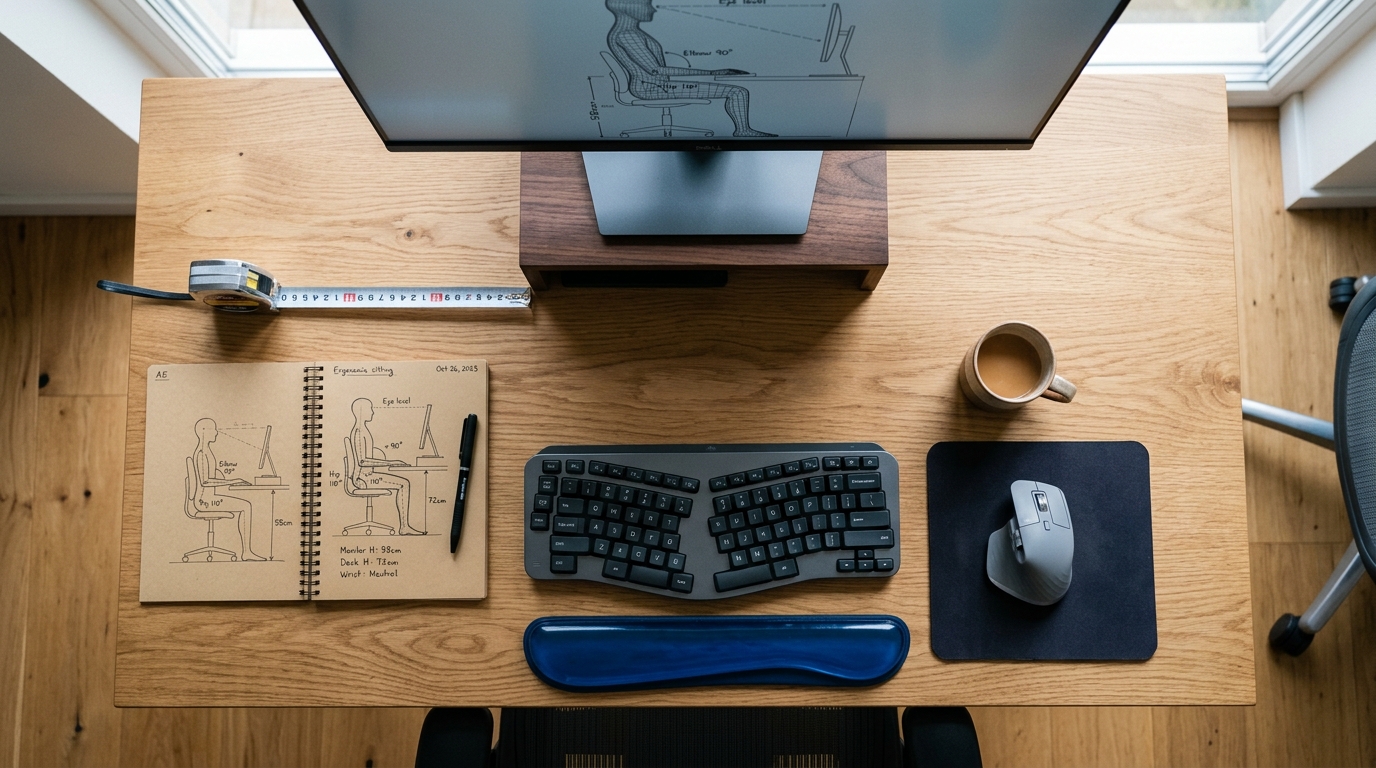
You can buy the best ergonomic chair, the best standing desk, and the best split keyboard — and still hurt your back, neck, or wrists if the equipment is set up wrong. The good news is the setup itself follows about ten rules, and once you’ve dialed it in, you don’t have to think about it again for years. This guide walks through the actual measurements and the common mistakes that survive even after the gear is upgraded.
References here lean on Cornell University’s Department of Design + Environmental Analysis ergonomics program (cuergo.dea.cornell.edu) — the most-cited academic source for desk-based ergonomics in North America — plus published ANSI/BIFMA guidelines and OSHA’s computer workstation eTool.
The 10-step setup (do these in order)
The order matters. If you set the desk before the chair, you’ll have to redo the chair. If you set the monitor before the desk, you’ll have to redo the monitor. Work bottom-up.
1. Chair height — feet flat, hips slightly higher than knees
Lower the chair until your feet are flat on the floor and your knees are at approximately 90 degrees. Then raise the chair another 1-2 inches so your hips are slightly higher than your knees. This single adjustment reduces lower-back pressure more than any other intervention.
If raising the chair puts your feet in the air, you need a footrest, not a higher chair. The footrest (a $30-80 footstool) is also worth using if your desk height is fixed at a height that forces you to either raise the chair too high or lower the keyboard too low.
2. Chair depth — three-finger gap behind knees
Slide the seat pan forward or back (most premium chairs have a seat slider) until you can fit three fingers stacked vertically between the front of the chair seat and the back of your knees. Less than that and the chair compresses behind-knee blood flow; more than that and the lumbar support no longer reaches your back.
3. Chair armrests — forearms parallel to floor when typing
Set armrest height so your forearms are parallel to the floor (or angled slightly downward toward your hands) when you type. Set armrest width so they’re close to your torso, not splayed out. Set armrest depth (if your chair has 4D arms) so they support the meaty part of your forearm without pressing on your elbow.
A common mistake: setting armrests too high so your shoulders are lifted. Lower them until your shoulders relax. If they can’t go low enough, the armrests are part of the problem, not the solution.
4. Chair lumbar — bottom of the lumbar curve at your beltline
The lumbar support should touch the small of your back, with the apex of the curve at approximately your beltline (lumbar 4-5 vertebrae). Too high and it pushes your mid-back forward, increasing thoracic kyphosis. Too low and it pushes your pelvis forward into anterior tilt.
Adjustable lumbar systems (Aeron PostureFit, Steelcase LiveBack, Humanscale Freedom) make this self-correcting; fixed-lumbar chairs require getting the chair height right first.
5. Chair tilt tension — recline when you lean back, no harder
The tilt tension should be set so the chair reclines smoothly when you lean back with light pressure, without feeling stiff or floppy. Static upright posture all day is worse than gentle alternation between upright and reclined; the tilt is what enables the alternation.
6. Desk height — keyboard slightly below elbow height
With your forearms parallel to the floor (from step 3), the desk height should put the keyboard surface 1-2 inches below your elbows. If the desk is too high, you have to raise your shoulders to reach the keyboard — which is the source of trapezius and upper-back tension by the end of a long work session.
Most standing desks have a 24”-50” height range that covers this. Fixed-height desks at 29” work for users 5’8” to 6’0” and require workarounds (keyboard tray, lift, footrest) for outliers.
7. Keyboard angle — neutral or negative tilt
The keyboard’s plastic feet at the back of the keyboard exist to angle the keyboard TOWARD you. Don’t use them. A positive-tilt keyboard forces your wrists into extension, which is bad. Keep the keyboard flat (neutral) or, ideally, slightly negatively tilted (sloping away from you) — most premium ergonomic keyboards include tenting accessories that allow negative tilt.
8. Monitor distance — arm-length away
With your back against the chair, hold your arm out toward the monitor. Your knuckles should just touch the screen, or the screen should be 2-4 inches further. This is roughly 24-28 inches for most users. Closer than that and your eyes work too hard on accommodation; further and you’ll lean forward to read text, which defeats every other setup choice.
9. Monitor height — top edge at eye level
This is the single most-misunderstood ergonomic setting. The TOP edge of the monitor should be at your eye level, NOT the center of the screen. Your eyes naturally rest 15-20 degrees below horizontal, which means the center of a properly-placed monitor sits 15-20 degrees below your direct sight line. A monitor with its center at eye level is too high.
For laptops, this means using a separate keyboard and either a laptop stand (raising the laptop) or an external monitor (positioning correctly). Laptops alone make this setting impossible.
10. Monitor tilt — top of screen slightly back
Tilt the monitor so the top edge is angled slightly away from you (typically 10-15 degrees from vertical). This compensates for the natural 15-20 degree downward eye angle. A monitor that’s exactly vertical creates glare and forces neck extension to read the top of the screen.
Common mistakes (most expensive to fix later)
After a decade of reading desk-setup posts in ergonomics forums, the same mistakes show up over and over:
Putting the laptop on the desk and using its keyboard. If the laptop is on the desk, the screen is too low. If you raise the laptop on a stand, the keyboard is too high. The fix is a separate monitor (or laptop on a stand) AND a separate keyboard. There is no laptop-only ergonomic setup for full-time work.
Center of monitor at eye level. As above — the TOP edge should be at eye level, not the center. This single fix usually resolves neck pain that’s blamed on chairs.
Keyboard positive tilt (rear feet up). Keyboards ship with rear feet you can flip down. Don’t. Keyboards should be neutral or angled away from you, never toward you.
Chair as the only intervention. A $1,500 chair under a desk that’s 4 inches too high and a monitor that’s 8 inches too low won’t help you. The chair is one component of five (chair + desk + keyboard + mouse + monitor + arm). Each has to be right.
Standing all day instead of alternating. The win from a standing desk is alternation, not standing. Standing 8 hours a day instead of sitting 8 hours a day swaps one problem for another (heel pain, lower-leg fatigue, lumbar compression in standing).
Mouse pad with wrist rest. A “wrist rest” under the mouse keeps your wrist bent and pressed against a hard surface. Either skip the wrist rest entirely (let your forearm support your hand from the elbow) or use a real ergonomic mouse that eliminates wrist motion (vertical mouse, trackball).
A reasonable checklist for verifying your own setup
Once you’ve gone through the 10 steps, this is the checklist that catches the remaining errors:
| Product | Best for | Rating | Notes | |
|---|---|---|---|---|
| Are your feet flat on the floor? | Yes/No | — | If no: adjust chair height or add a footrest. | — |
| Are your hips higher than your knees? | Yes/No | — | If no: raise chair 1-2 inches. | — |
| Forearms parallel to floor at the keyboard? | Yes/No | — | If no: adjust armrests, then desk height. | — |
| Top of monitor at your eye level (not center)? | Yes/No | — | If no: raise the monitor with an arm or riser. | — |
| Monitor at arm-length distance? | Yes/No | — | If no: move monitor; the further problem is usually a too-deep desk. | — |
| Keyboard neutral or negative tilt? | Yes/No | — | If no: flip down the rear feet, or use an ergonomic keyboard with tenting. | — |
| Tilt tension lets you recline with light pressure? | Yes/No | — | If no: adjust the tilt-tension knob. | — |
When to upgrade equipment vs adjust setup
A general rule: try setup adjustments first; upgrade equipment only when adjustments hit their limits.
- Lower-back pain after long sessions → adjust chair lumbar, then chair height. Upgrade chair if the current one doesn’t have adjustable lumbar.
- Neck pain or upper-trap tension → adjust monitor height (the most common cause). Upgrade to a monitor arm if your monitor stand doesn’t reach the right height.
- Wrist pain or hand numbness → adjust keyboard tilt to neutral. Upgrade to a split keyboard if the symptoms persist.
- Forearm tightness or “tennis elbow” → adjust armrests, then check mouse position. Upgrade to a vertical mouse if the symptoms persist.
- Feet falling asleep / hip stiffness → adjust chair seat depth, then chair height. Upgrade to a chair with seat slider if the current one doesn’t have one.
If the recommended adjustments don’t help within 1-2 weeks, the equipment probably needs upgrading. The full kit recommendations are in best ergonomic home office setup.
FAQ
Frequently asked questions
How long does it take to feel the effects of an ergonomic setup?
How often should I take breaks?
Should I use a kneeling chair, balance ball, or saddle stool?
What about dual monitors?
How important is lighting?
Do I need a footrest?
Bottom line
Set up the chair first, then the desk, then the monitor — bottom-up. Top of the monitor at eye level, never center. Hips slightly higher than knees. Forearms parallel to floor. Keyboard neutral or negative tilt, never positive. Monitor at arm-length distance.
If you’ve done all of that and you’re still uncomfortable, the equipment is probably what needs upgrading: chair, desk, keyboard, mouse, or read the full ergonomic office setup.